
Social media has become a powerful platform for content creators, businesses, and influencers to engage with their audience. The secret sauce to gaining visibility often lies in creating viral content—short, captivating clips that resonate with viewers and inspire them to like, comment, share, or follow. CapCut desktop video editor, a feature-rich yet user-friendly tool, is an excellent choice for designing such content. Here’s a comprehensive guide on how to craft viral social media clips using CapCut’s desktop version.
What Makes a Video Go Viral?
Before diving into the technical aspects of CapCut, it’s essential to understand the characteristics of viral content. Viral clips typically:
- Evoke Strong Emotions: Videos that make viewers laugh, cry, or feel inspired are more likely to be shared.
- Offer Value: Educational, entertaining, or relatable content tends to resonate.
- Keep It Short and Sweet: Most viral clips are concise, making them easy to watch and share.
- Follow Trends: Content that aligns with popular challenges, memes, or sounds has a higher chance of going viral.
CapCut desktop video editor is equipped with tools such as text-to-speech AI, Auto Captions, and more that help creators tick all these boxes.
Why Use CapCut Desktop Video Editor for Social Media Clips?
CapCut, developed by ByteDance, the parent company of TikTok, has gained immense popularity for its intuitive interface and powerful features. Here’s why it stands out:
- User-Friendly Interface: The layout is intuitive, even for beginners, making it easy to edit videos without extensive technical knowledge.
- Advanced Features: CapCut offers professional-grade tools like chroma key, background remover, motion tracking, and keyframe animation.
- Trend-Focused Tools: With a library of trending effects, transitions, and music, creators can effortlessly align their content with social media trends.
- Cross-Platform Functionality: Projects created on the desktop version can allow flexibility.
Steps to Create Viral Social Media Clips Using CapCut Desktop Video Editor
- Planning Your Content
Before opening CapCut, a video editor for PC, have a clear vision of your video:
- Define Your Goal: What emotion or message do you want to convey?
- Research Trends: Explore platforms like TikTok, Instagram Reels, and YouTube Shorts for trending ideas, hashtags, and sounds.
- Script and Storyboard: Jot down key points and decide on the structure of your clip. For instance, begin with a hook, followed by the main content, and conclude with a call-to-action (CTA).
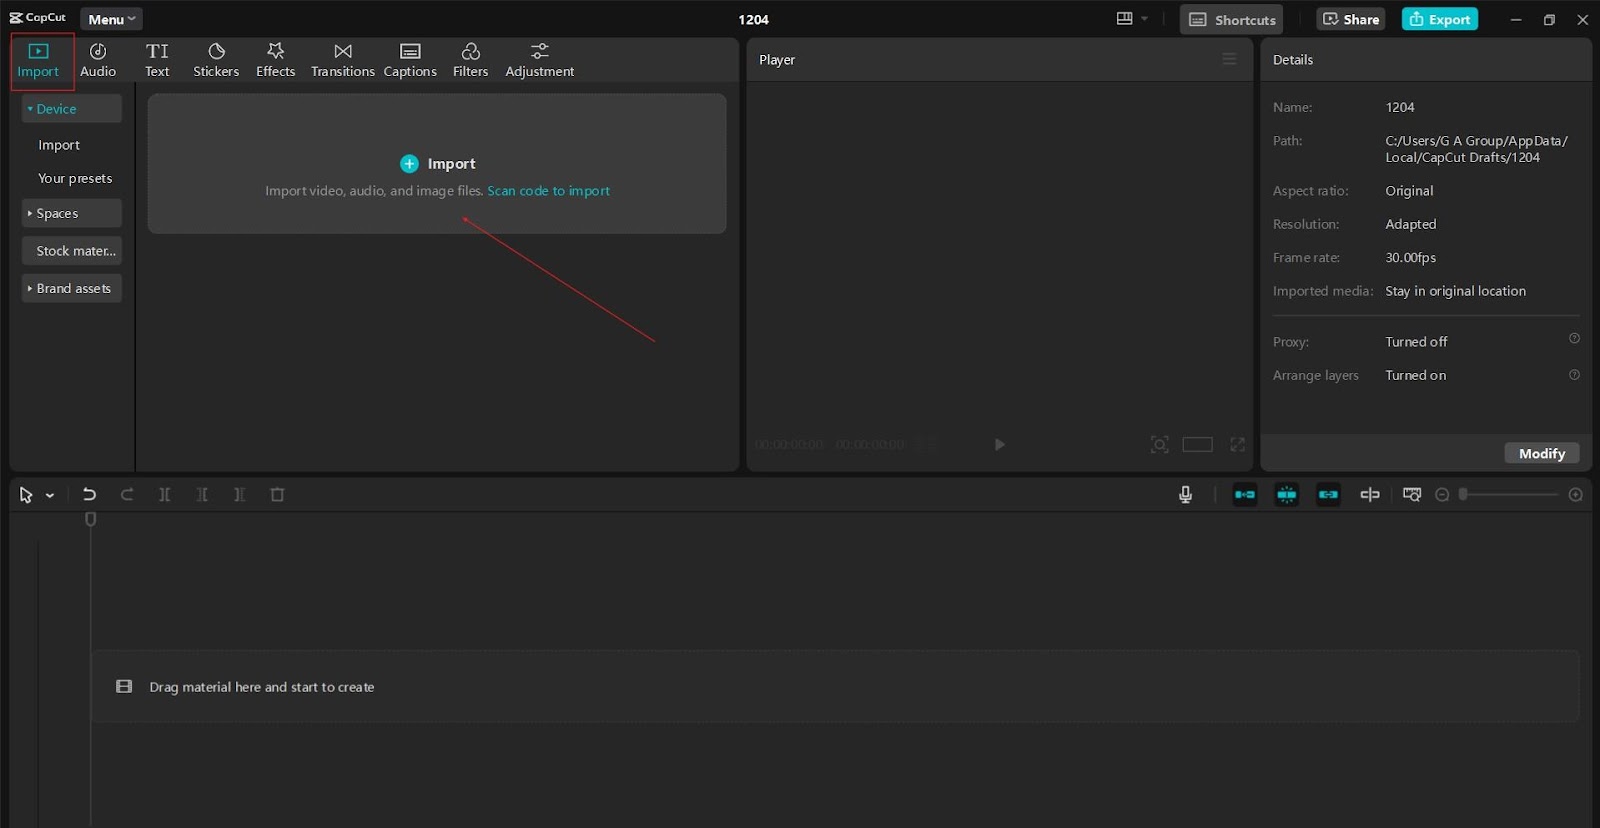
- Importing and Organizing Media
- Launch the CapCut desktop video editor and start a new project.
- Import your media files by dragging them into the media library or using the “Import” button.
- Organize your clips, images, and audio in the timeline for easy access.
- Editing the Video
CapCut editing tools are designed for precision and creativity:
- Trimming and Cutting: Shorten your clips to keep them concise. Use the “Split” tool to remove unnecessary portions.
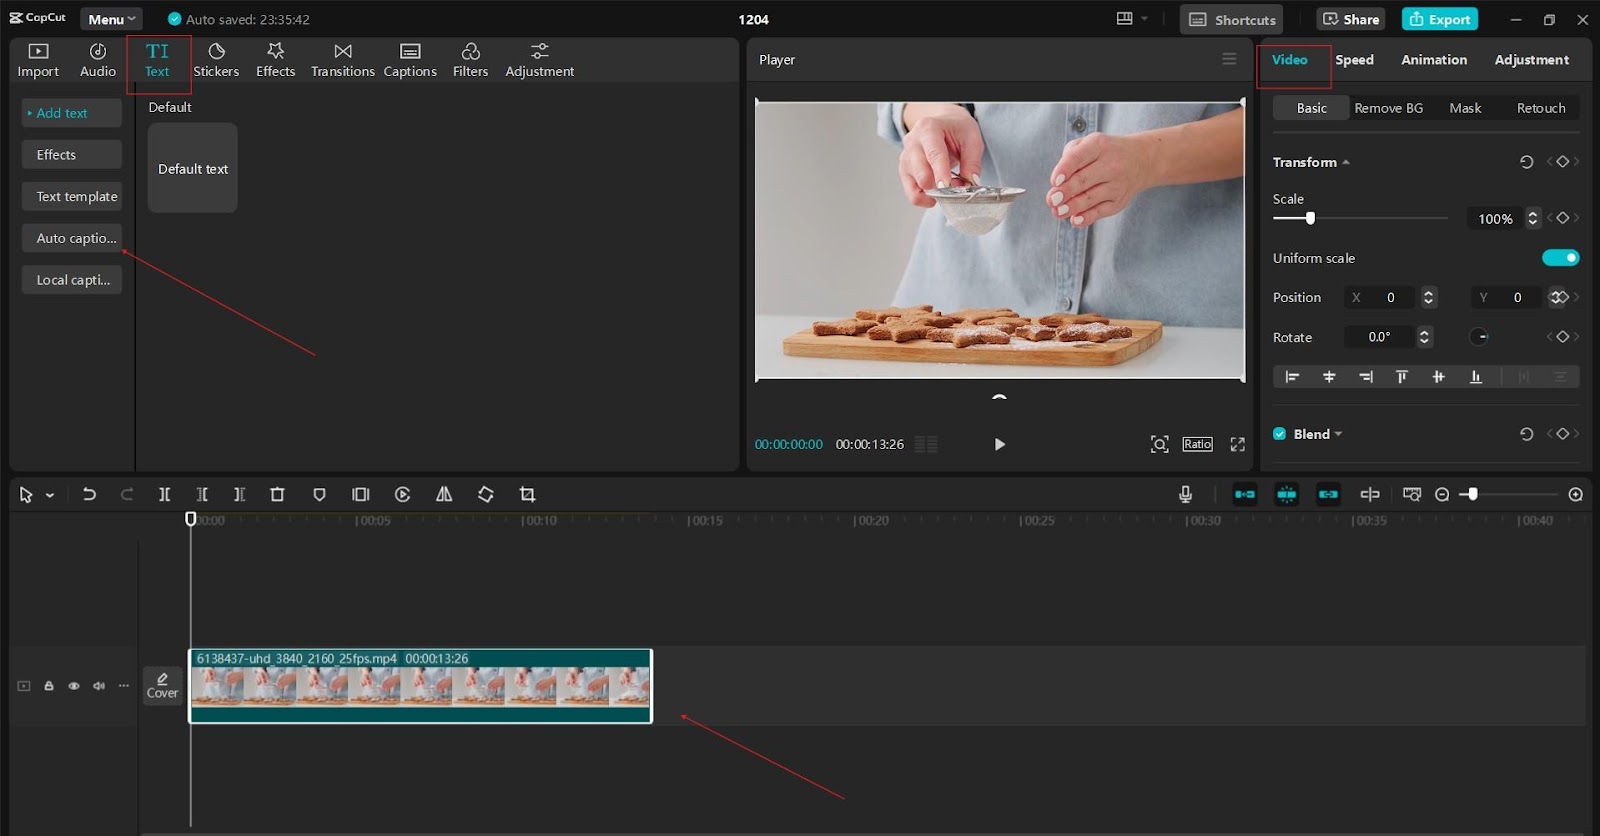
- Adding Text and Subtitles: Viral videos often include captions to ensure the message is clear, even without sound. CapCut’s text tool offers customizable fonts, colors, and animations.
- Transitions and Effects: Use dynamic transitions and trending effects to maintain viewer interest. The “Effects” tab offers options like glitch, blur, and sparkle effects.
- Adjusting Speed: Slow-motion or fast-forward effects can add drama or humor. CapCut’s speed control lets you adjust playback seamlessly.
- Enhancing Visuals
- Filters: Apply color filters to set the mood of your video. CapCut has preset filters or manual color grading options.
- Chroma Key (Green Screen): Remove backgrounds and replace them with custom visuals using the chroma key feature.
- Stickers and Overlays: Add engaging stickers, emojis, or overlays to make your clip more interactive.
- Integrating Audio
Audio plays a critical role in making videos go viral:
- Trending Sounds: CapCut provides a library of music and sounds. Using trending audio increases your clip’s chances of visibility.
- Voiceovers: Add a personal touch by recording voiceovers directly in CapCut.
- Audio Syncing: Sync your transitions and cuts with the beat for a professional look.
- Polishing with Advanced Features
- Keyframe Animation: Use keyframes to create smooth animations for text, images, or videos.
- Motion Tracking: This feature lets you anchor elements like text or stickers to moving objects in the video.
- Split Screen: Display multiple clips simultaneously using the split-screen feature, which works great for comparisons or storytelling.
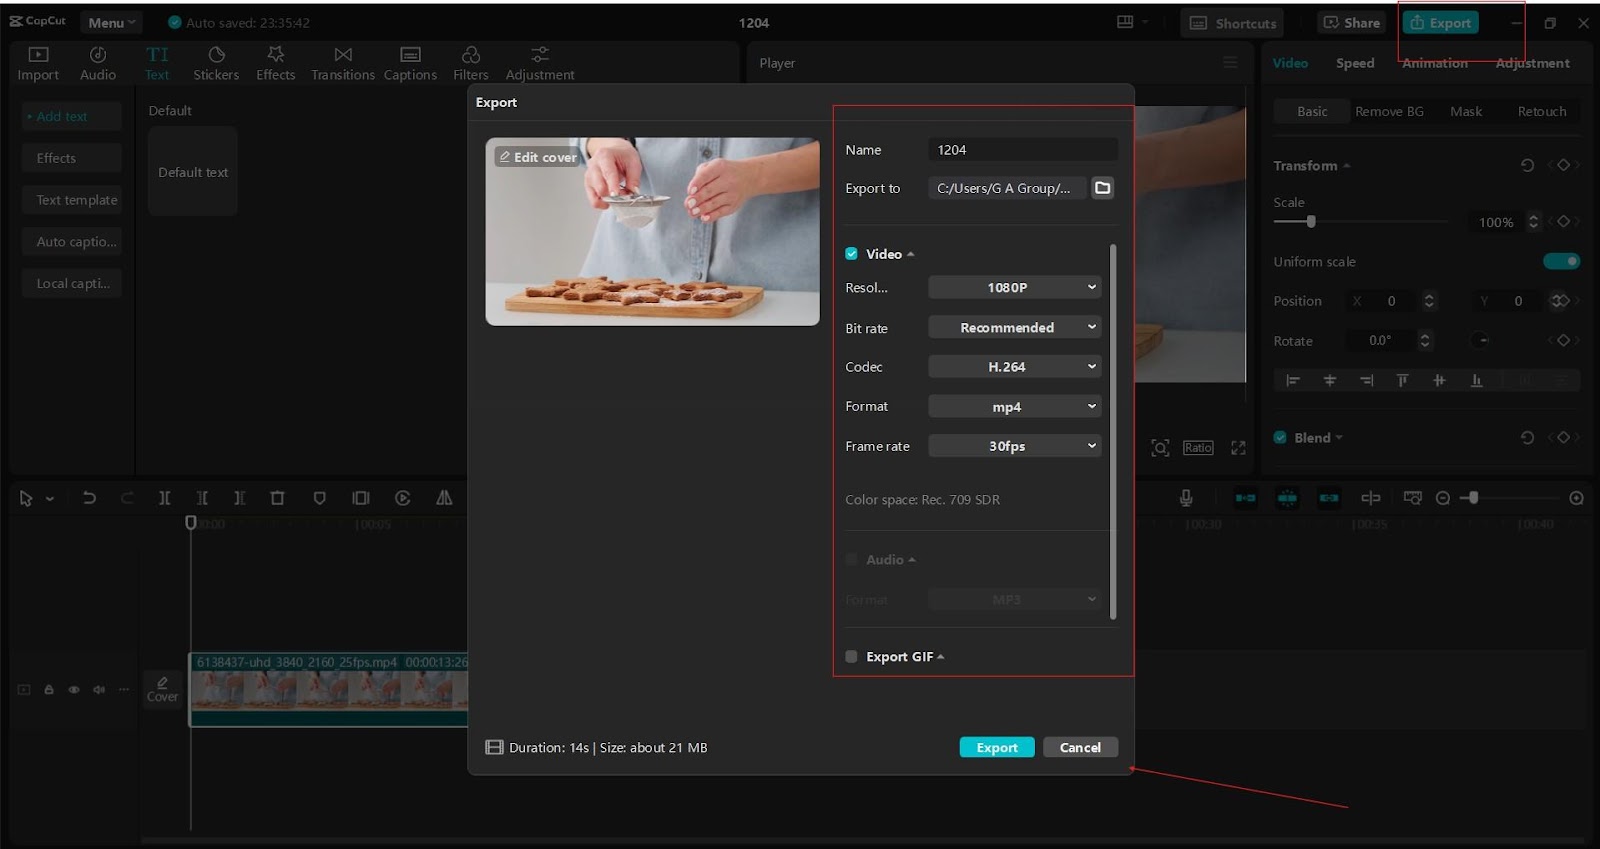
- Exporting and Optimizing for Social Media
- Choose the right resolution and aspect ratio for your target platform. For instance:
- TikTok and Instagram Reels: 9:16 aspect ratio
- YouTube Shorts: 16:9 or 1:1
- Select “Export” and ensure the video is in high quality (at least 1080p).
- Compress the file size if necessary, as large files can reduce upload speed.
Tips for Maximizing Engagement
- Use Hashtags: Include relevant and trending hashtags in your video description.
- Timing Matters: Post during peak engagement hours.
- Encourage Interaction: Add a CTA like “Tag a friend!” or “Share if you agree!” to boost shares.
- Monitor Analytics: Analyze metrics to see what works and refine your approach for future content.
Conclusion
Designing viral social media clips involves a blend of creativity, technical skill, and trend awareness. CapCut desktop video editor equips creators with all the tools necessary to craft engaging and professional-looking videos that capture attention and inspire action. By leveraging its features and adhering to the principles of viral content creation, you can elevate your social media game and make a lasting impression on your audience.